|
|
|
||||||||
|
|
|
||||||||
The Black Beasty - 1970 GT6+ |
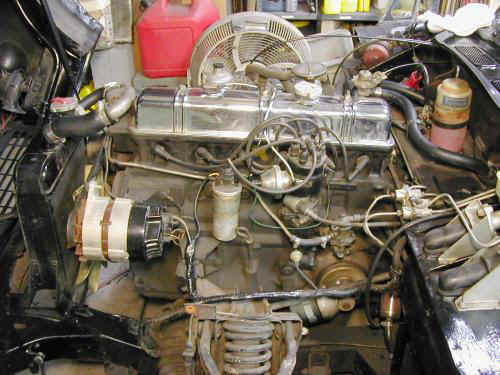
The engine compartment
I have to give the p.o. at least a bit of credit. The engine compartment does show signs of recent 'replacement' of parts, and etc. All the radiator/heater hoses look relatively new. The chrome valve cover was pretty dirty. A little Eagle Wadding Polish cleaned it up rather easily. I adjusted the valves, cleaned the plugs, rebuilt/cleaned the distributor and checked the compression.
I of course dove right in and pulled out the dist, cleaned it up, tested it and re-installed it. I make it a habit to ALWAYS replace any flex fuel lines. Before replacing the dist., I used my electric drill to spin up the oil pressure before doing a compression test the first time. tip/trick: Simply chuck a long screw driver bit into your drill. Remove the distributor mount pedestal and cam driven pump gear. Stick the screw driver end into the end of the pump and you can spin up oil pressure. The compression was good in all cyls at roughly 159 +/- 5psi. It's a got a five wire Lucas alternator on it, that is still nice and strong. It puts out a good solid 14.3 volts at 2krpm crank speed.
|
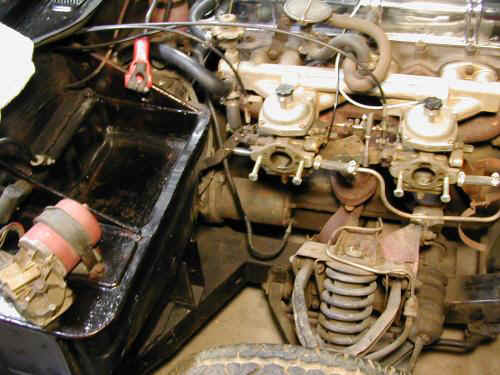
The area around the wiper motor and parts of the battery box, were still primer red, just like the floor pans. So after a pit of soap and water, I hit the area with a bit of gloss black rattle can. The gas peddle to carb throttle and choke linkages all need major attention. I simply adjusted everything (properly), added a few springs, and snugged everything down properly. The starter is relatively strong. I guess it should be, considering it IS nearly new. The old 'core' was in the box with receipt in the boot. The suspension bushing look to be in good shape. The bushes are still centered in all the a-arm ends and no freeplay is detectable.
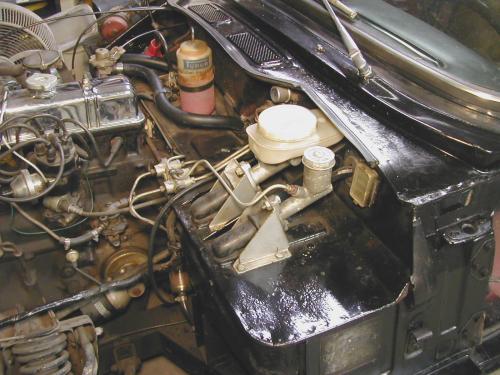
A good scrubbing brought out relatively glossy black paint. In this shot, you can see I also added the gas struts for the bonnet. Here I used the 126003's for this setup, thinking those flair would add a bunch of weight to the bonnet. Well these struts seem long on this installation. I welded 'ears' to the side of the frame rails for the lower end mounts. This let me set the upper mount in a convenient location and have the bonnet at the angle I desired.
|
The brake and clutch master too, are relatively new. The p.o. had actually used the old trick of plastic food rap over the fluid chambers before replacing the caps. BOTH cyls still had clean fluid in them. EVEN WITH THE REARS DISCONNECTED all that time! A good bit of soap and water here did wonders as well.
|
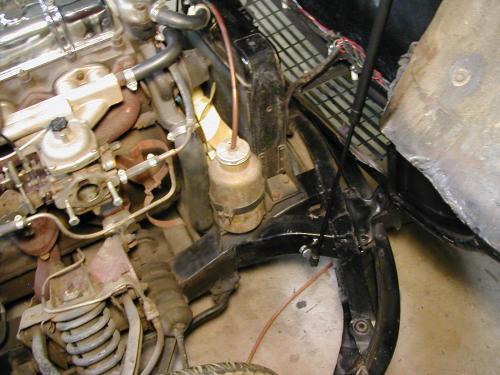
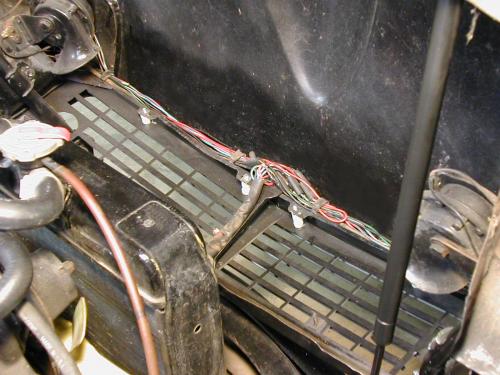
All the wires up front were ripped out and properly repaired. Lengths were spliced in, soldered and crimped as needed, and the connectors cleaned. A few new splice blocks, and all re-connected as designed. The nice and clean dielectric greased contacts should hold up nicely for many years to come. A metal grill was installed in place of the broken plastic version that came stock on the '70 T6+. The white right behind the grill is nylon stand-offs, rather than the stock aluminum spacers. (no more rot and frozen 'molted' aluminum.)
|
![]()
©1987-2010
All material copyright© Teglerizer 1996-2008last edited
3/15/08

hits since last reset