|
|
|
||||||||
|
|
|
||||||||
The Black Beasty - 1970 GT6+ |
A new Speed6 custom dashboard - installation
| Well as usual I
just had to play. Next thing you know I've go the whole dash apart. It's that
'shipwright's disease' coming through again. While I've got this apart I might as
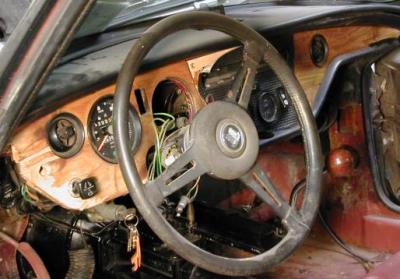
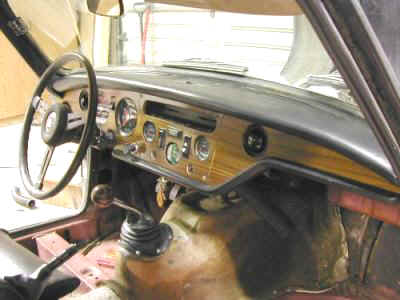
well fix this. So If I'm taking this apart I might as well fix this now too..and .... The original dashboard in the car was a disaster to say the least. The wood was literally disintegrating. Even the the layers of the plywood substrate were separating. Varnish? ...nearly non-existent. The Speedo was locked up solid. The tach worked fine. |
|
|
|
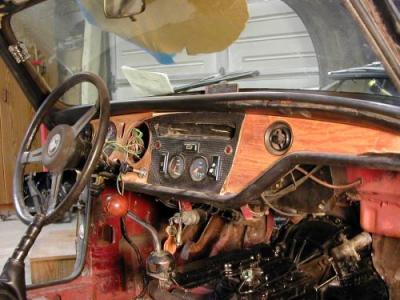
This all started with me fixing the burned up wiring under the dash. While trying to get all the lights working, I had to pull the tach to reach a few wires as well as pull the emergency flasher switch, to fix IT. Although as purchased, there was a dashcap laying on top the dash, it was not really installed. It wasn't until I pulled it all apart that I found it had no dash top vent grills and one of the under dash vent pieces was missing completely as well. Ha... what do you know.... I have all three pieces sitting on the shelf here. :-)
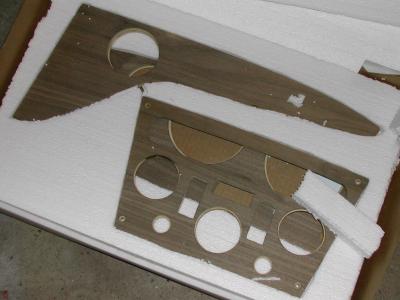
The new dash was one of the Speed6 units you see on EBay these days. I acquired this one with the car as part of the deal. It's got the Speed6 logo rubber stamped on the back of the panels, and #3 hand written on each piece (maybe they were unit number 3 of the production run, hence the ill fit). Personally, I don't think they're that great. Yes...they re-arranged the gauges/switches to fit a third gauge, and the veneer is rather nice. But after 10 coats of polyurethane, and getting ready to install it, I found it to be a quite ill fitting piece of wood work. The emergency flasher switch did not even fit into the hole. It wasn't just the poly coats. I had to sand it out nearly 1/32" of both sides of the switch to get it to fit. I had to trim off nearly 1/2" of the wood at the doors to get the speedo/tach panel, and passenger panel to fit (too long). The gauges also sit too deeply into the wood. You can see a bit of the un-colored 'edges' of the wood around the gauges. None of the rear mounts to bolt it to the dash metal work were marked properly. I had to hold it all in place and try to mark the backs via the holes in the metal metal work to determine where to screw on the mounts. |
|
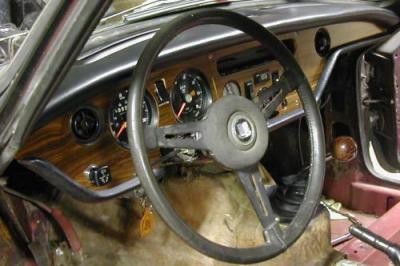
All in all it looks pretty damn good compared to what was there!
|
|
|
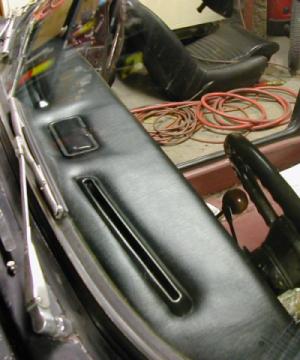
The top of the dash was
badly cracked (as usual) I decided to not even use the hard cover I had here. I
ended up using 'Great Stuff' foam to fill in the cracks. Sanded it all down, then covered
it in a layer of car headliner foam then heavy vinyl. This process is just like what I did
on Thirteen's dash. I stripped and
painted the spare pair of vent trim pieces I had and installed them here to replace the
missing units. UNLIKE the Spitfire dashtop, this
pad's leading edge does NOT go under the windshield edge. The windshield frame lower edge
mount bolts are recessed in the dashtop, and this dashboard top panel hides those
three mount bolts and flanges. |
![]()
�1987-2010
All material copyright� Teglerizer 1996-2008last edited
3/15/08

hits since last reset