|
|
|
||||||||
|
|
|
||||||||
Thirteen - 1967 Spitfire MKIII Specific Tasks and Procedures |
|||||||||
|
|||||||||
|
|||||||||
|
|||||||||
|
|||||||||
|
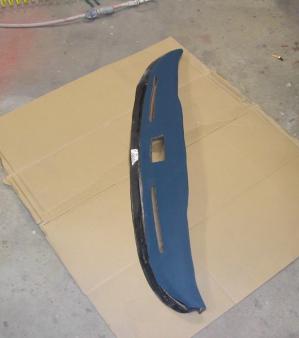
| Well after ending
up with two of the wrong dashtop overlays, I decided to simply repair and
recover the dashtop like I did on Big
Red. The problem here is I couldn't find a proper coverlay. No
one seems to make the proper type for these early MKIII's that have the 'bumpout'
in the middle. They might be avil. in the U.K. but s/h $$ would have been
more than the cost of the overlay. So I
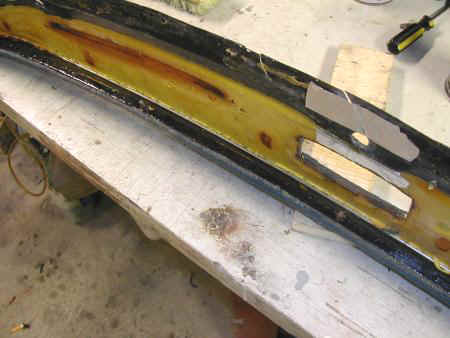
had to find some way to fix the cracked up and badly damaged original hard
vinyl surface of the original dashtop.
|
|
 |
I decided to used that expando foam stuff used for home insulation repair. A product called Greatstuff. Man is that stuff messy, and sticky. So be careful if you do this and don't get it on anything. It's near impossible to get it off your hands so wear gloves. It's full of air, so I use a bondo scraper to smooth it as I apply it. It'll take a few coats, because as you touch it while wet, it collapses. After three applications, I let it dry. It sands very easily, and feels much like the original dash foam when dry. |
|
|
|
|
I used a combination of 3M spray glue and Weldwood contact cement to attach the foam and vinyl. The spray glue was used in the middle, while the contact cement was used on the edges. BE CAREFUL pressing the foam too much or your glue 'through' the thickness of the foam and leave yourself a 'dent' in the foam. |
|
 |
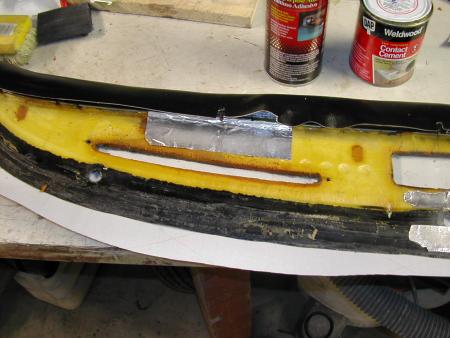
After initial gluing I trimmed off the foam on the leading edge with a razor blade. I figure the vinyl will hold the foam in place under the edge that bolts into the dashboard right above the gauges. The extra thickness of the foam here would have made it hard to mount snuggly up to the dash metalwork. In this photo, you can see a piece of metal foil duct sealing tape, used to span the broken plastic near the center mount hole/ashtray hole area. |
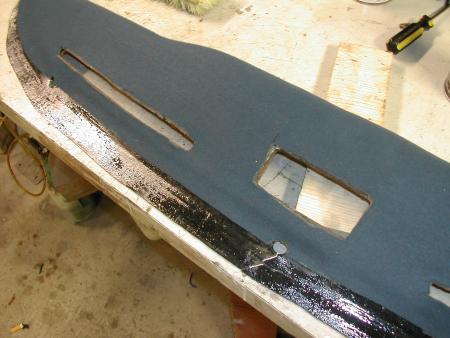 |
I Also trimmed the foam back, where the dashtop would fit under the edge of the windshield frame. Again, the extra thickness would have caused problems trying to position the bottom windshield seal properly. In this shot, you can see the shiny coat of contact cement has already been applied, that will hold the leading edge of the vinyl in place. A simple single edge razor blade is the only tool needed to trim to fit. I stopped the foam, just shy of the line where the windshield frame would bolt down. |
|
. |
After carefully stretching the vinyl out on the floor, (knees holding one side, one hand to stretch it ever so slightly to remove wrinckles) as I laid the dashtop onto the vinyl. After smoothing out the middle, I peeled back the edges and applied contact cement to the back of the vinyl, and the leading and trailing edges of the dashboard hard plastic surfaces. After drying I carefully and evenly, stretched the vinyl around the edge and pressed it in place. I trimmed it to fit afterwards. The front was trimmed to clear the mount studs and NOT overhang the groove that fits the cars dashboard metalwork. |
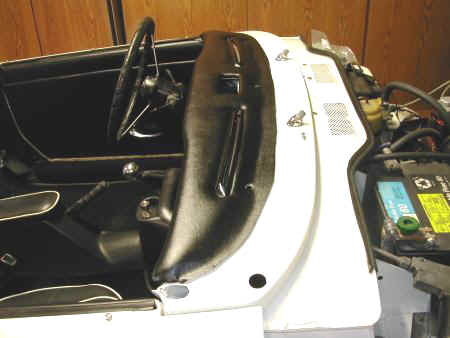 |
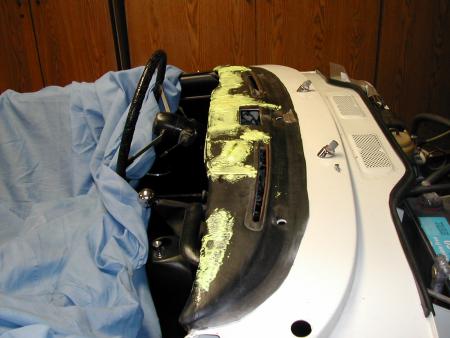
After initial test fitting of the covered dash,
I loosely installed the previously re-painted defroster vents to hold it
in place, while I bolted up the seven studs that hold the leading edge to
the front of the dash.
|
 |
Then it hit me. Well... maybe experience told me I'd have a problem getting the windshield to body seal, 'curled out' (and in) properly with the extra thickness of the dashtop. So a simple trick... I laid two pieces of rope along the top of the dash, before installing the windshield frame. One inside the frame, and one outside the frame. Then as the windshield was bolted down, I simply pulled on the ropes, which rolled the lips of the seal out into place to lay the 'lips' of the seals into the designed positions. |
|
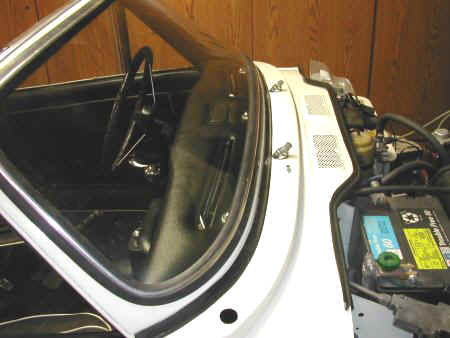
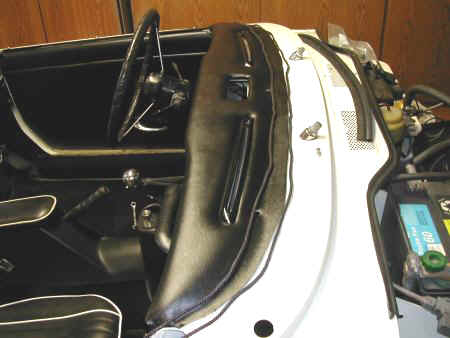
Well the windshield is
back in, with it's new seal around the glass. I smartened up this time and
installed the chrome seal trim BEFORE installing the glass. The rope trick
for the lower seal, followed the same method described in the manuals for
installing the glass seal. You lay it in the groove, and pull the rope to
pull the lip in over the frame. The hole in the panel is the antenna
hole. I'll probably use one of the short plastic flex whip antennas like I
used on Lil' Greenie. (my MG Midget.) |
| The dashtop turned out
great. Actually this is the first time I added foam to the dashtop so it's
softer and more plush looking than normal. The foam I use is
standard car headliner foam. It's cloth faced on one side so installation
in simplified as it's not that easy to distort or rip the foam. This is
the same stuff I use when making my own door
panels.
|
|
![]()
©1987-2010
All material copyright© Teglerizer 1996-2008last edited
3/15/08

hits since last reset


index