|
|
|
||||||||
|
|
|
||||||||
Thirteen - 1967 Spitfire MKIII Specific Tasks and Procedures |
|||||||||
|
|||||||||
|
|||||||||
|
|||||||||
|
|||||||||
|
|
While the procedures here were photo'ed while installing a vinyl convertible top on my '67
Spitfire, the techniques to install a top are the same regardless of model year. Only
slight variations in snap locations, frame type, and shape of the top vary. A couple of 'words of wisdom' before you start. You need to remember that regardless of your top type...I.E.: canvas, vinyl, mohair, they will all stretch a bit. Obviously at different amounts, based on the type of material. Since most people will be installing 'new' tops, you also need to remember they've been sitting on a shelf, all folded up in their cartons for heaven know how long. So the folds in the material need to be flattened/stretched out before you complete the installation. This WILL be done during the installation, so it's not like you need to try and get rid of all the wrinkles before you install it. More on that will be explained later.
|
|
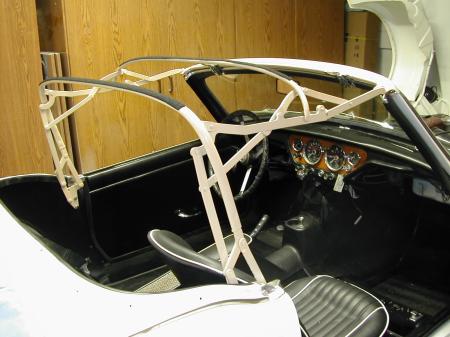 |
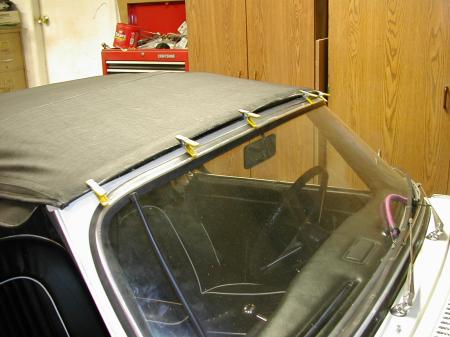
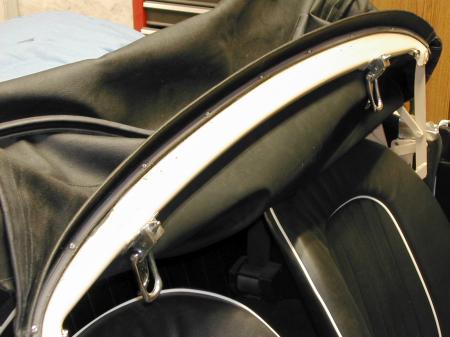
First things first. The frame needs to be installed and locked down to the windshield via
it's appropriate fasteners. In this case, my frame got a fresh coat of paint during
the rehab of Thirteen. You'll notice black stripes across the two top rails. These are 'padding' to keep the top from rubbing on the frame. I simply used long strips of the 'fuzzy half' of Velcro strips. They're self adhesive so installation was rather straight forward. Install your mount bolts in the rear mounts on the sidewalls, but don't bother tightening them down yet. You'll need to be able to adjust them later while test fitting the material top. |
 |
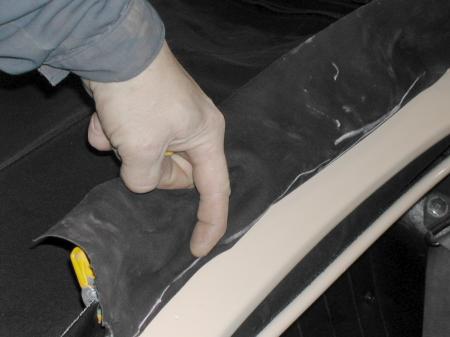
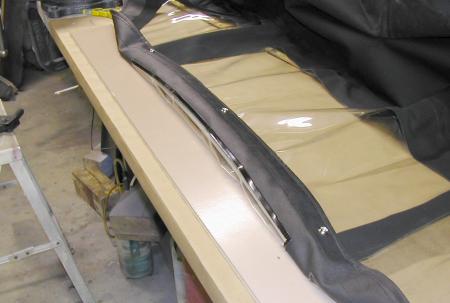
Now you need to lay out the top flat on the
workbench (or floor) so you can install the rear mount plate. Check fit the metal plate
under the flap (held back by the little yellow clamps in this photo) at the rear base of
the top. Mark a center line on both the top and metal plate. (chalkboard chalk works well
here but a piece of masking tape with a pen mark works fine too) |
 |
After the contact cement dries, line up the center of the metal plate with the center mark you made on the ragtop. Stick the plate under the 'flap' as tight down into the seam as possible. NOW REMEMBER you need to stretch the top a bit before you stick down the flap all the way across the width of metal plate. Working from the center, pull the top towards the side as you stick the flap down, remembering to follow the curve of the metal plate. keeping it's curved edge down tight into the seam as you stick down the flap. Once one side is down, pull the other side out, following the curve and stick it down. Once the flap is attached, you can squeeze the top down as well to stick it to the back side of the plate. |
 |
Finding the holes for the snaps can be a bit tricky, but a bit of patience, a scratch awl,
and comparing the position of the snaps on the car body work, you should be able to find
the holes easily. Install the three snaps that will be used for your tonneau cover
with aluminum or stainless steel rivets. I like to use backup washers whenever I use
pop-rivets on anything (visible in the photo above) This photo shows the bottom edge of the top flipped over to show the three snaps pop-riveted in place. (Notice you can see the bottom curved edge in each of the last two photos) |
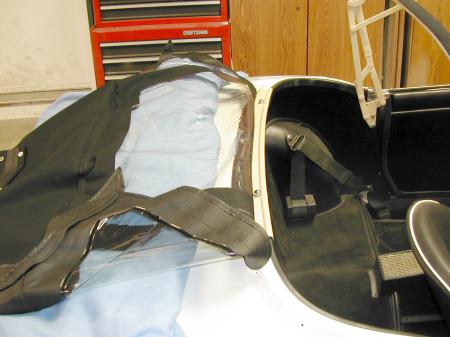 |
Now you can
take the top over to the car and bolt down the rear mount plate to the captive nuts in the
top of the rear passenger compartment rail. Lay the ragtop on the trunk top side down
against the metal work, install the two bolts, and tighten them down. You won't need to
touch these two bolts again at all during your installation. Do not install the rest of the snaps along the back just yet. You'll need to get the top stretched out a bit first before marking their final locations accurately. |
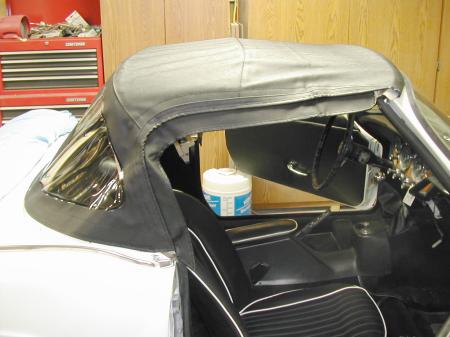 |
Now you can
pull the top up and over the frame and wrap it around the leading edge of the frame at the
windshield. Pull it taught all around to get it smoothed out a bit and centered as
much as possible. Pull the sides down a bit as well to see that the lower edges next
to the door handles are in roughly the same positions on both sides of the car. When you're happy it's fairly well centered, again, with a piece of chalk, mark a center line on the ragtop material on the leading edge of the frame, in the center, as well as piece of tape or mark on the windshield frame top center. (You can do it right on the glass if desired...easy to clean up later.) |
 |
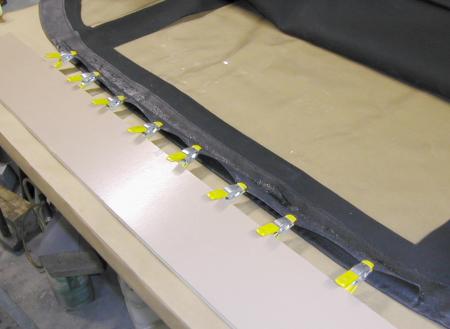
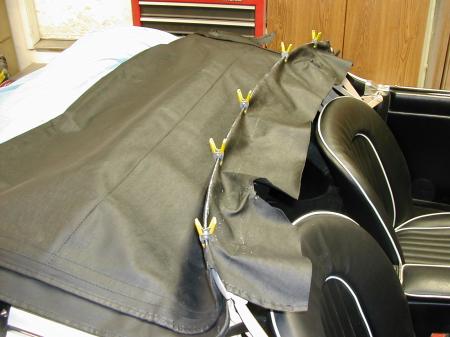
You can go ahead and fasten the center header rail attachment 'roll' around the center rail. This will help hold the top on during further assembly steps. In this photo you can also see the leading edge of the material, pulled around the frame, and semi-locked in between the top frame, and windshield frame. A single edge razor blade can be used to trim a bit of material around the front fasteners if it stops you from locking down the frame. BUT BE CAREFUL not to trim too much! Now comes the fun part, pulling it all taught.Those little yellow tipped clips have been coming in really handy. About a $1 a piece at a hardware store. |
 |
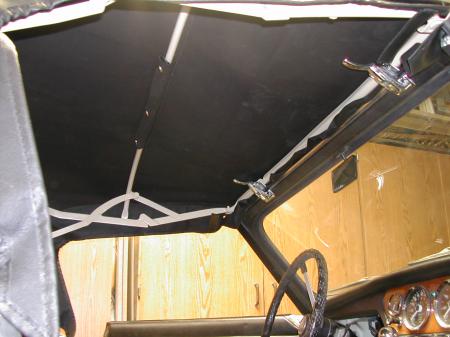
As you
work around the car, pulling the top tight, stick a clip on to hold it. (A clothes pin
might work as well but the tips are a bit thick to let the top lock down.) After three/four times of tightening up the top... you really need to let it sit a day (or so) to relax. Then come back and stretch it again. You'll easily get another inch or two of material up and over the front frame, and the center of the top over the passenger compartment may still not be tight. I actually repeated this process six times over a three day period. REMEMBER to stretch it WIDTH wise across the front as well! When your happy let it sit one more day to see if it relaxes any more before trimming any material. |
 |
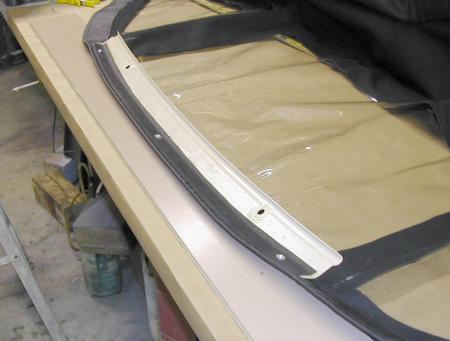
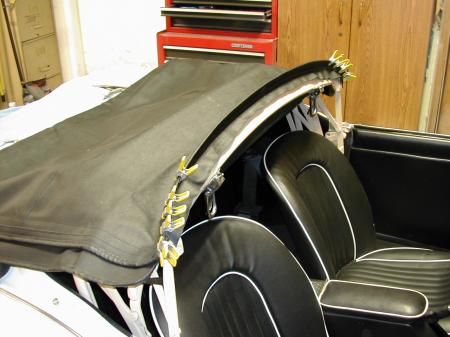
Mark the entire
leading edge with chalk so you know where the material needs to fit the front frame rail.
Notice here (compared to two photos back) how much further the material stretched
before I marked this leading edge. You can trim back a bit of material here now, but
don't trim it back any further than about within 3" of where you see the clips in
this picture. Enough material needs to be left here to fit under the seal strip to hold it
in place. You'll also notice, the top has still not stretched across the width of the
frame enough to cover the outer ends. We'll deal with this shortly. |
|
Carefully lay the extra material over the edge of the front frame member, following the
contours, and then fold back the material and mark a cut-off point on the under side. Make
sure you leave enough material to cover the holes where the front frame seal mounts.
This chalk mark will tell you where you need to apply glue in the up coming steps. With the underside marked, you can now remove the ragtop from the front frame rail. |
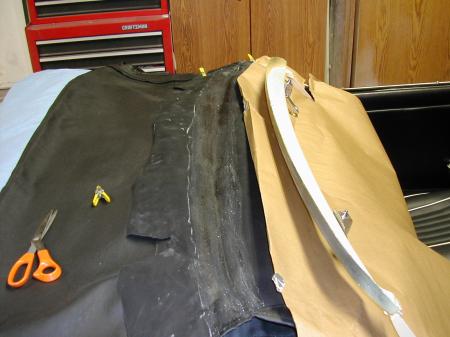 |
Here I laid it back on the trunk, and stuck some brown paper between the frame, ragtop and
interior to protect the interior and top from my own sloppiness with the contact cement. The chalk line you can see in this photo is the one marked on the underside when the leading edge was folded back before the clips were removed.. You can also see the glue layer already applied here to the ragtop material Lay down a layer of contact cement about three inches wide. You don't want the contact cement to show 'inside' the car, so it only should be applied to the area of the top that will contact the lip, and under the front seal retainer. |
 |
Once the glue dries, and starting at the 'center' mark you made earlier, you can start attaching the top to the front frame rail. Start by laying the top material, right on your leading edge line, right on the leading edge of the front top frame rail. Press the top material over the edge, down the underside of the frame rail, and across the area where the holes are for the seal retainer. Now working out towards the sides, you need to stretch the top along it's width as you lay the top material onto the frame. In this photo, you can see it took several clips to hold the outer edges as it had to be stretched 'width-wise' as it was glued down. The material can now be trimmed back with a razor blade. |
 |
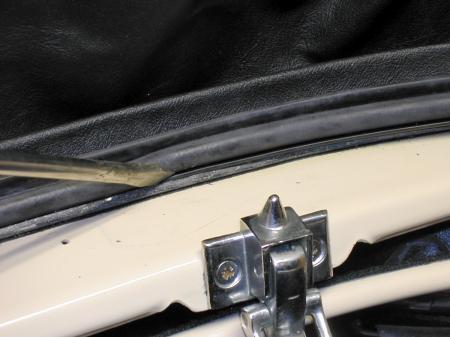
After
the glue sets up (well... contact cement if used should be instant) you can
re-install your front seal retainer bar. Some were originally installed with tiny
screws. I chose to use pop-rivets with backup washers. If using rivets (or even
replacement screws) be careful concerning their length. You don't want them protruding
though and punching holes in the roof top material latter. After the retainer is installed you can trim the material back right up to the edge of the retainer bar. |
 |
Installing a new front seal can be a real pain! I had to open up the little 'C' shape of the retainer bar as mine was a bit bent here and there. Once centered along the frame' width, and with the back edge of the lip of the seal in the 'C'... starting at the center, use a screw driver tip, to slowly work across the seal to get the full lip inserted down into the 'C' of the retainer. AFTER you complete the seal installation THEN trim the ends off at the windows. I chose to simply fold the extra length at the windows, up into the frame rail. That way when the roof is up, the door window to windshield seals, butt tight against the roof leading seal, helping to further water proof the car and cut down on wind noise. |
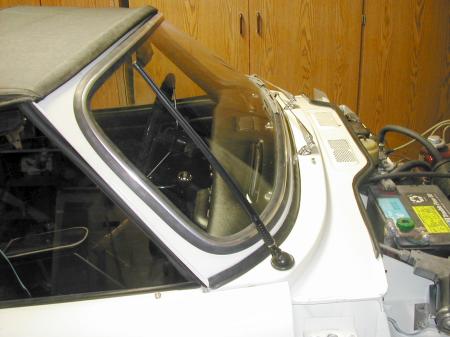 |
You can see here the sides of the top now reach and fully cover the side edges of the
front frame rail. The top should be good and taught now, but not 'tight'. Now you can turn you attention back to the rear of the
top, and install the remaining snaps along the bottom edge around the passenger
compartment. |
 |
By having left the frame loose, and after installing the snaps, you can lift/position the
frame to tighten up the whole thing and then tighten down the mount bolts in the desired
position. All this isn't hard. Just take your time, and think before you act. A little patience, a lot of test fitting, and you'll be happy with your results.
|
![]()
©1987-2010
All material copyright© Teglerizer 1996-2008last edited
3/15/08

hits since last reset


index