|
|
|
||||||||
|
|
|
||||||||
Whitey - 1975 Spitfire Specific Tasks and Procedures |
||||||
|
||||||
|
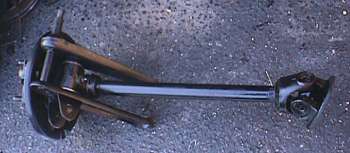
This page is more a document of a 'bypass' I've found When replacing rear axle u-joints, you need to remove the axle. Torquing the spring to upright bolt needs to be done, AFTER you lower the car, and settle the suspension. This is the only way to get proper set of the bushing in the spring eye. Trying to torque this bolt once the wheel is back on, and the car is on the ground is a pain to say the least. Well when performing this task I use a short cut that has proven a real time saver, and a safety measure to boot.
|
|
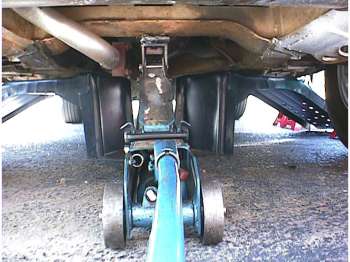
| After blocking the front wheels I jack the car
up by the center frame rail just below and behind rear diff. I then sit my metal car ramps
under the center chassis rails. They are angled and positioned (front to rear of the car)
to coincide with the height of two more jack stands under the rear chassis extensions.
|
|
|
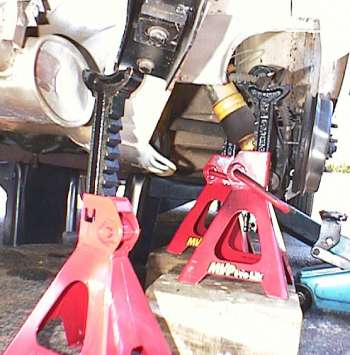
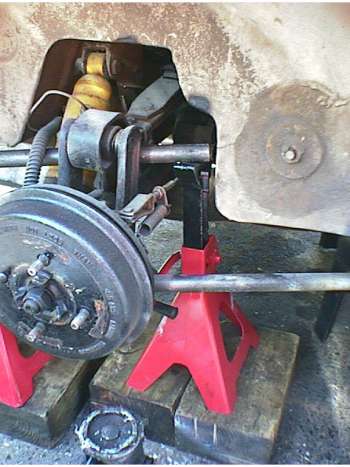
| With the chassis firmly on stands, I place the
hydraulic jack under the brake drum (park brake engaged). I place two jack stands one
fore, and one aft, of the axle. I jack up the drum until the car just starts to lift off
the stands so the spring is firmly compressed as if it was sitting on the wheel on the
ground. I then stick a pickle fork across the tops of the stands and under the spring. The brake hose is not stretched in the photos at all. One stand is further back than the other. The pickle fork is 'outside' the band clamp on the spring. This way it won't pull the fork 'in' under the springs as it tries to push back down. Lowering the hub off the hydraulic jack settles the car back on the stands with the spring compressed up and out of the way. This also makes it very easy to withdraw the axle from under the spring and above the chassis rail Now I can go through the exercise of disconnecting everything to remove the axle with full safety from underneath (axles to the diff) as well as no load being on the uprights by the spring.
|
|
|
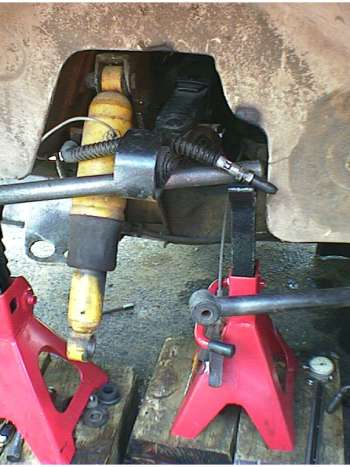
| After installing new trunnions and u-joints, The
cleaned up and repainted rear axle assembly it ready to go back in. The real joy of this method of support, is the clearance of the spring, and the compressed position. I simply lift the hub 'up' into place, inser the top bolt through the spring, and torque it. Then jack up the drum, remove the 'trapeze' and stands. Put on the wheel on and I'm done (on that side anyway). Finish the other side the same way, put the car back on the ground and just roll it out to settle the suspension. |
©1987-2010
All material copyright© Teglerizer 1996-2008last edited
3/15/08

hits since last reset