|
|
|
||||||||
|
|
|
||||||||
Big Red - 1973 GT6 MKIII Specific Tasks and Procedures |
||||||||||||
|
||||||||||||
|
||||||||||||
|
||||||||||||
| There are products out there to
rehab. your dashtop. Some companies will even completely re-foam, and then heat-shrink new
vinyl onto the dashtop. Lately, it seems like the old 'Coverlay' dashtop covers that use
to fit rather well, are being replaced with stock from the suppliers of a much cheaper
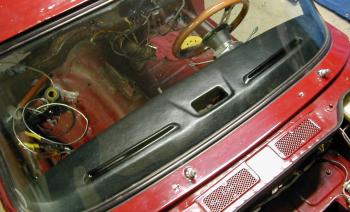
quality unit. Such is the one I have in hand. When I bought Big Red, there was no dash at
all under the hard plastic overlay. Thanks to a fellow lister, I at least acquired a foam/vinyl dashtop, but yes, it was badly cracked and needed recovering. Since this plastic overlay was so ill fitting, I contacted one of the companies, famous for show quality dash refinishing just to get an idea of what it might cost to have them build up a 'like new', 'like original' complete dash top. Here was their response... Dash Pad Restoration in black $400, in color $450. Lower Dash Pad Restoration $150. Cores and color sample needed. Turn around time is 3-5 weeks. We can only do these if they have minor superficial cracks and absolutely no warpage. Wow! No way! If it only had minor cracks and no warpage I could do it myself! So that's what I did. |
|
|
I simply took the old, cracked up dashtop, contact cemented the cheap overlay onto it, and wrapped it in heavy weight vinyl. The problem with these new overlays is they don't reach the windshield to completely cover the dash. So of all places, the bad fit shows most, from outside the vehicle. |
|
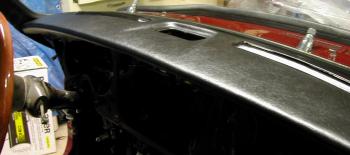
After the plastic overlay was contact cemented in place, I used 3M Super weather Strip Adhesive (yellow gorilla snot) to fasten the cloth backed vinyl to the new hard plastic surface. |
 Showing the grain and contours |
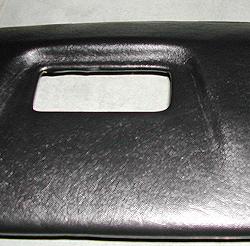
This shot is simply to show the grain of the vinyl I used. Very close to original looking , but with a much deeper sheen. The only tricky part, was cutting the edges to cover the ends of the dash, near the doors, where it wraps around the dash front edge. |
But when you're doing it, you'll see the solution is rather easy. You can simply stuff the edges right into the foam of the old dash pad, so it all still fits without problems. |
|
©1987-2008
All material copyright© Teglerizer 1996-2008last edited 03/18/10

hits since last reset


index