|
|
|
||||||||
|
|
|
||||||||
|
| Introduction | First Models | Sensors | Engine Management Basics | ||
| Requirements | Sub-systems | Tuning | Sizing Injectors | ||
| gas tank mods | Fuel supply system | My first ECU | F.I. Links - Sources | ||
| Special Project Wide Band Oxygen Meter | O2/Tach/Vac/Timing Logger | ||||
| Other peoples Triumph F.I. Installations/Projects | |||||
| Special Project Megasquirt - The Quintessential D-I-Y Fuel Injection ECU | |||||
| Building a Custom GT6 Manifold | Whitey's F.I'ed Spit6 Project | ||||
| Building an MGB manifold | Experimental twin bodies on a GT6 | ||||
| Building a twin TB MGB manifold | The other half of the story | ||||
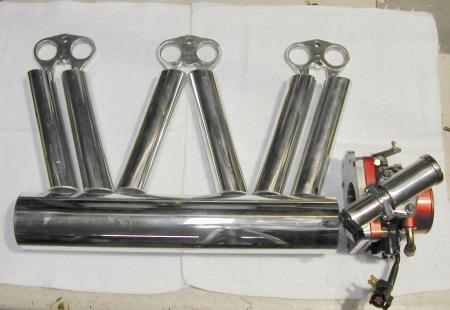
| Obviously these don't exist, off the shelf, so I had to
design and build one myself. I decided on many parameters of the design,
the way I always do, based on the parts I could find and what I could tool
up myself.
I used flanges
cut from an old manifold. Plain and simple... it was easier than trying
to make them from scratch myself. I bolted them to a spare head and port
matched them by grinding them to match the head ports perfectly. I used
a 10" composite cut-off wheel mounted in my miter saw, to cut the port pipes.
This is all 6061-T6 and should be easy to weld up. I even found the proper
4043 welding wire for my new wire spool welding gun. I figure
polishing the metal now (as shown in the pics) was easier than trying to do
it later. I'll only need to re-polish the areas around the weld later on
after assembly.
|
|
 |
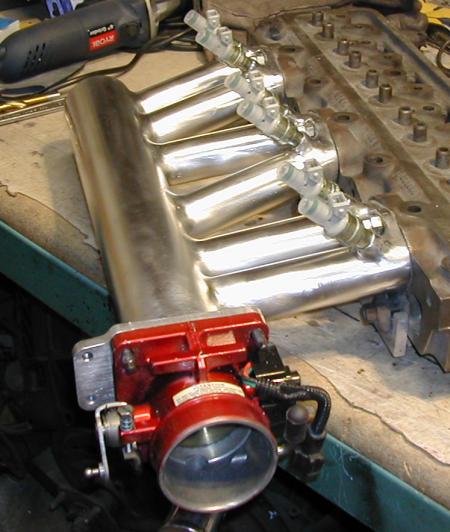
My fuel rail is
being made out of parts from a BMW M3 fuel rail. I cut the little injector
cups off a rail and will weld them onto a rail of my design. A separate
firewall mounted fuel pressure regulator and pressure gauge will be used. |
|
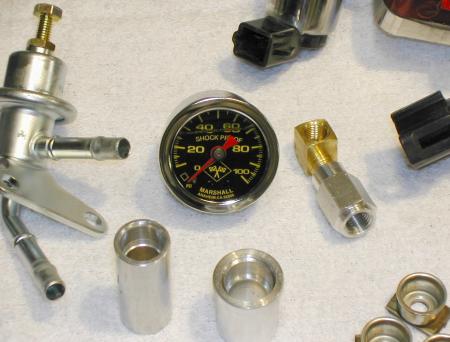
update 2/18/06 |
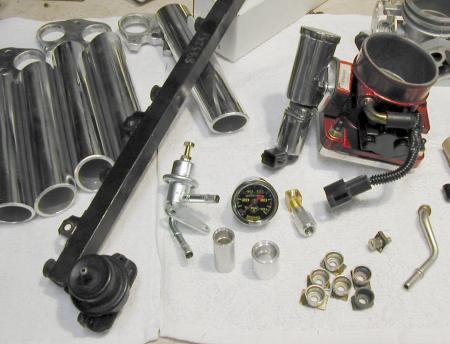
The Toyota fuel pressure
regulator is adjustable (30-100 psi). The Marshall glycerin filled
fuel pressure gauge will be mounted right on the rail. I've got two
different styles of injector bungs ready to weld into the manifold.
I had milled an extra groove in the larger bungs (bottom center) around
the tops to capture a second larger o-ring. This would have helped to
isolate the injector and minimize heat transfer/soak. But I think now I'll
probably use the thinner style (bottom center left) due to the smaller
mass... expecting less heat transfer to begin with, as well as a cleaner
look.
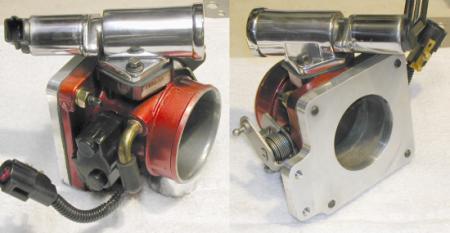
I haven't decide which pump to use yet. Either the Volvo unit above, or the MSD unit below. The MSD unit does match the port size of my fuel pressure regulator unit better. Plus the simple hose barb ends of the MSD unit should make for an easier installation and repair process at any future date. |
|
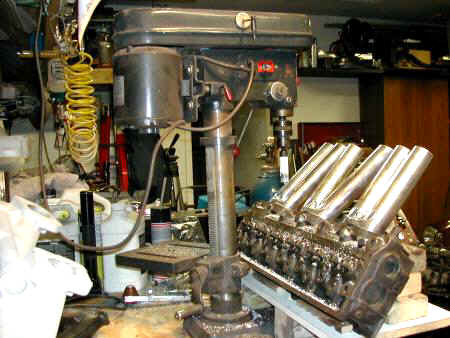
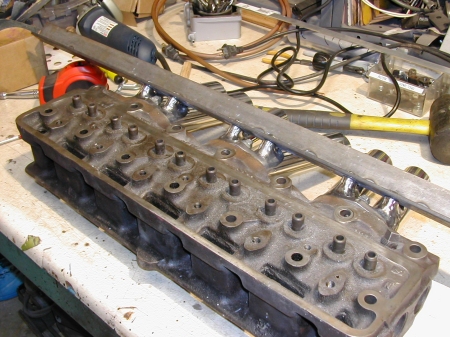
. I've never really ever tried to build something out of metal this complex before. I'm surprising myself even, how well this seems to be turning out thus far. Since I hate measuring things, it takes me a bit of thinking to figure out the right sequence and or how to jury rig stuff to do what I want to do. This sequence of manufacture and assembly has been tricky. I built up a jig for the head to sit on. I bolted the flanges to the head and setup a rack to hold the runner tubes while I welded them to the flanges. I must have then spent about 8 hours, just grinding and re-polishing everything. I then built up this jig to drill the injector bungs. I wanted to make sure they'd all be in line so everything was bolted back to the head, and moved to the drill press. |
|
|
|
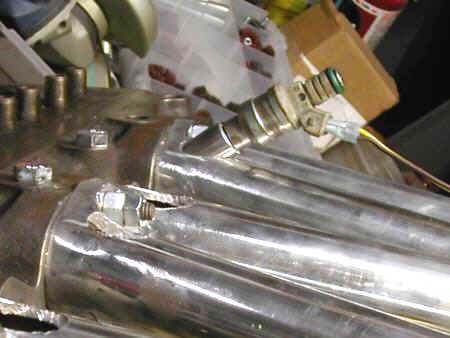
Cutting up the metal isn't all that hard, but welding aluminum can be really trying. These now really look great, but it took a LOT of grinding and re-polishing to get them this sleek looking after welding. |
|
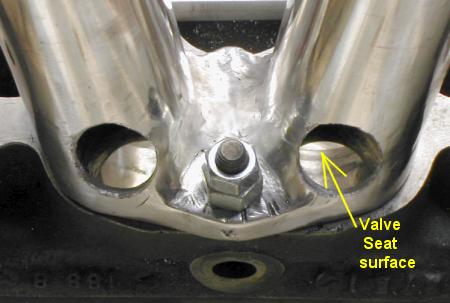
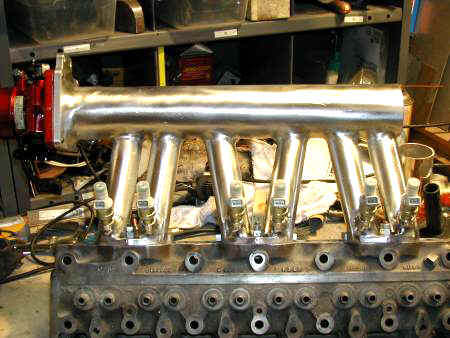
Another big advantage of angling these runners down a bit, allowed me to position the injectors to fire right down at the backs of the valves. In this next shot you're looking right down the drilled bung hole as if YOU are the injector. That's the back (inside) side of the vale seat you're looking at.
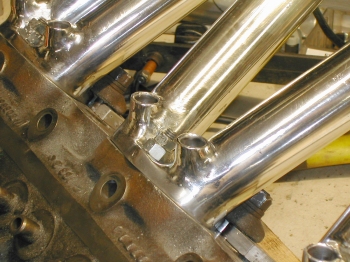
Next comes welding all the injector bungs in. I'll need to build another jig to hold them and line them all up in relation to each other. Once positions are determined I'll need to cut/trim all the bungs at an angle, to minimize the grinding on the inside of the runners. update 2/21/06 Well I got the bungs installed and all the runners cuts to the same lengths. In this next shot you can see the jig I made up to make sure all the bungs were level to each other so the fuel rail and injectors would all be equidistant.
It's simply angle iron with bolts through it and short pieces of 1/4" fuel line. The bungs were all jammed onto the hose bits, inserted into the runner holes, and tack welded. After a lot of grinding and polishing, I'm happy with this end of the manifold.
|
|
| ...update 2/23/06 | |
| Well I
cheated bit here. I drilled the main plenum runner holes on my own
bench top drill press, but only to a diameter of 1.5" (it's
the largest bi-metal hole saw I had). I needed to go out to 1.65"
for the runner pipes to enter. But doing all that grinding was/is
getting tedious. So I took it into work, and had my buddy in the machine
shop, bore them to 1.65" and accurately space the holes, based on
the template dimensions I gave him. It took us all of about ten minutes
to re-drill the bigger holes. He was quite impressed with my
'eye-balling' and 'hand held' holes I had already drilled.
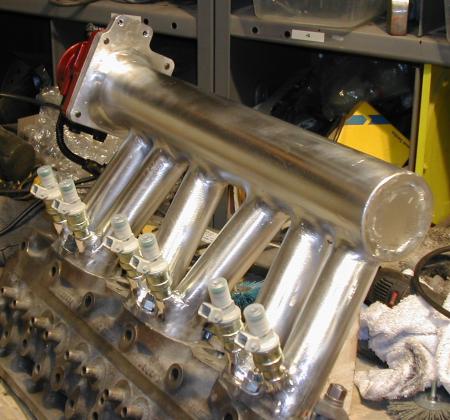
So last night and tonight, I finally completed the final shaping of the plenum tube holes to get all the runners to fit right. BUT...at the last minute I decided to extend the plenum a couple of inched to increase it's volume, as well as move the throttle body out a few inches from the front runner. So a bit more work was required. I finally got it all welded up, and spent about two hours just grinding all the welds to look this sleek. |
|
|
|
|
|
In these shots, the manifold still needs to be re-polished once again. Tangs need to be added to fasten the fuel rail mounts to, and a throttle cable linkage and mount designed and mounted. update 2/5/06 The manifold is complete! see it here
|
![]()
©1987-2010
All material copyright© Teglerizer 1996-2008last edited
3/15/08

hits since last reset