|
|
|
||||||||
|
|
|
||||||||
(started 10/2002)
Big Red - 1973 GT6 MKIII Specific Tasks and Procedures |
||||||||||||
|
||||||||||||
|
||||||||||||
|
||||||||||||
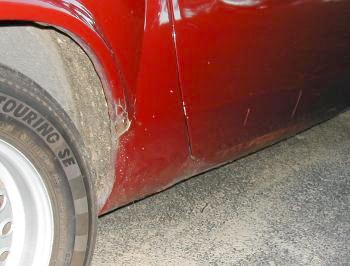
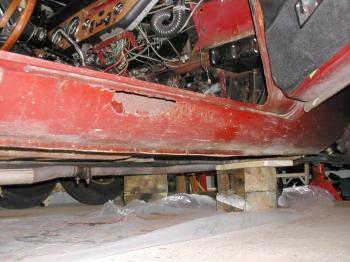
| Well on first inspection, yes, Big Red
looked to be in good shape from it's resto back in 1995 by it's P.O. But closer
inspection after a bit of digging into the metal revealed quite a bit of rust in the lower
portions of the car.
|
|
|
From the outside it looks like just the wheel arch needs a bit of attention. |
|
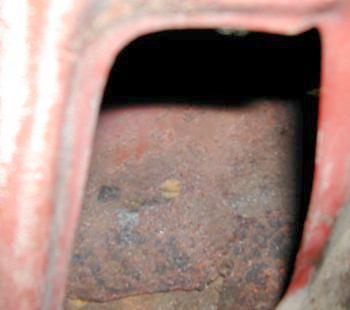
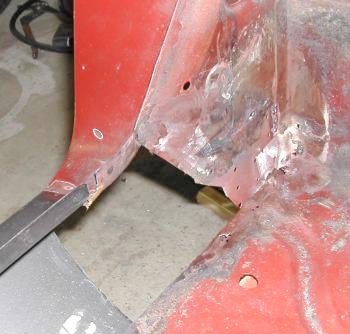
Looking through the inner fender well from inside the car, shows an apparent previous patch panel work, that is now thoroughly rusted over it's entire surface. |
|
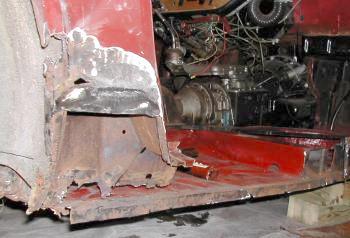
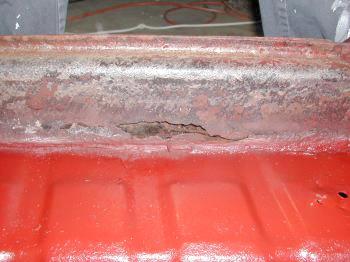
After tearing into it, the entire passenger side sill section, and rear dogleg metal was almost none existent. With grinder and tin snips in hand, the inner and outer sills were removed, along with the outer dogleg panel area. I had to completely rebuild the lower inner wheel well area, as well as reconstruct the inner lower rear corner of the interior panel area. |
 |
A cheap source of sheet metal, is the typical assortment of the galvanized steel, home decking construction assembly pieces. I simply ground off the galvanized coating where the welds needed to be. The zinc coating (galvanized coating) vaporizes when welded and can be quite poisonous. So be VERY careful. When welding I have the garage door open, and a big fan blowing the vapors away from me. |
|
The inside corner was a nightmare to reconstruct. I had to use the drivers side to model, but reverse everything. It took me about 6 separate pieces to reconstruct the corner to make it solid enough to support the b-post and sill ledge and floor edge. |
|
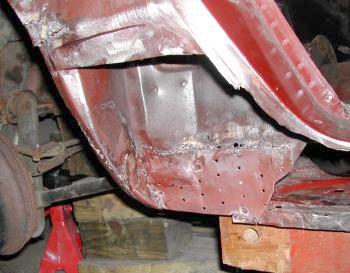
Reconstructing the inner fender well lower corner was a real challenge. Many many trial fittings of the dogleg patch panel were implemented to get the right shape. After hammering out a U-shaped piece of metal, I snipped it several times so the U could curved to match the rest of the dogleg,wheel arch curve. The upper edge visible in this photo is made of about 5 small strips of metal tack welded, hammered to shape then finally welding was completed. |
|
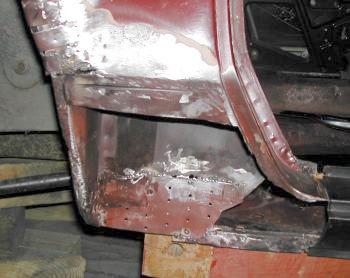
Well it's all there. You can see the wheel arch curve that was such a time consumer. Not hard ... just time consuming with many many trial fits to get it right. Before I sealed all this up with the outer panels, everything got a heavy coat of Rust prevention/converter, and then primed and painted. |
|
The outer dogleg patch panel meets the vertical seam, which makes it easy to hide. Just above the panel is the repair made of multiple small strips of metal to repair the shape of the wheel arch area. The bottom edge was plug welded (holes drilled through panel and welded around the hole) the top edge was seam welded. I'm going to use polyester resin rather than Bondo since it does not readily absorb moisture like Bondo does. |
|
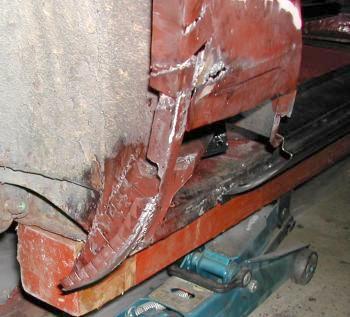
Ok... to the sills them selves. Yep...inner, center strengthener member, and outer sill all need replacement. |
|
The inner sill was rusted through as well. You can see the inner strengthener member is also rusted through. |

|
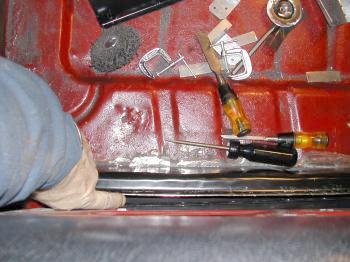
Extensive use of my angle grinder made it easy to remove all the old metal work. I simply ground through at the welds to remove everything. |
|
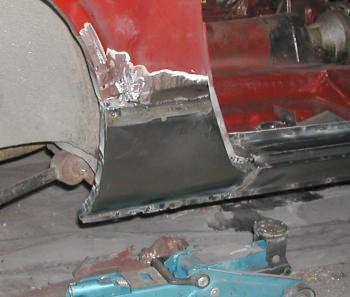
Test fitting of the new panels took a bit of hammering to have them fit perfectly but was rather straight forward. A few c-clamps in appropriate places while test fitting made things easier. Plus the 10-15 c-clamps I bought were a heck of a lot cheaper then 10-15 pairs of vise-grip pliers. |
 |
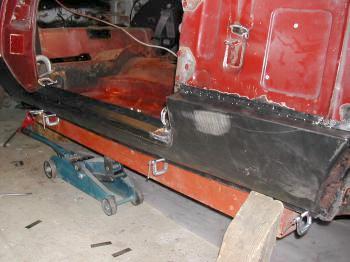
The outer sill was installed as well throughout the testing fitting process. Again, a variety of c-clamps made this quite easy. |
 |
This shot shows of a cheap trick I used to make sure the
floor was straight. On top of the hydraulic the floor jack, you can see the old
4"x4" piece of wood I used to level the floor and support the body. At the front, one of my wheel chock wood blocks is wedged up against the bottom of the panel to force it into place to check that it was straight. |
 |
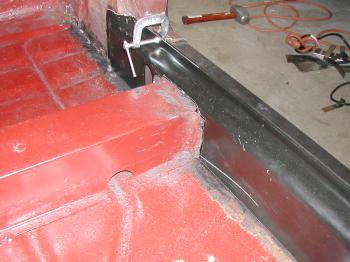
Now..the real bummer. After re-attaching the door for
checking fit, the bottom of the door sticks out about 1/2" father than the sill does.
If I stick my finger down between the outer sill and inner strengthener member, the outer
sill matches the door bottom perfectly. Hmmm.... I got it!
|
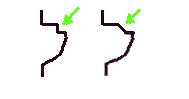 |
I ended up hammering out the little zigzag of the outer sill which extended the distance from the top weld flange to the edge of the sill that meets the edge of the door bottom. The image at left shows the orig profile (left) and the modified profile (right) |
 |
Ok... with all the welding and grinding done, the body
filler work starts. I filled in the low spots and gaps and smoothed the curves with the
filler. Then sanded...and sanded... and sanded...and ...
|
 |
The final step is glazing putty to fill in the pin holes
and seal the filler. And more sanding. Finally alternating layers of primer and more
and more sanding.
...now to match the red and buy some top coat. |
Well the drivers side isn't shown here as it's simply a repeat of this side, only not quite as bad. I only needed to replace the outer sill and read dogleg area. The inner sill is rock solid with no rust. So the existing metal was covered in Extend just to make sure there wouldn't be any future problems. |
|
| ....stay tuned.... |
|
©1987-2008
All material copyright© Teglerizer 1996-2008last edited 03/18/10

hits since last reset


index